Tables are extremely easy to modify and work with, as this InDesign tutorial with show. InDesign is very good with tables, unlike many other programs. Adding one in is very simple, and you can even import Excel and Word tables into InDesign. Modifying your existing tables is also easy to do, and you can learn all about it in this InDesign tutorial.
Inserting the Table
1. Getting the table into the InDesign document is something that can be hard for a beginner to figure out, as unless you know it’s not obvious. To begin, you must draw a text box for the table to reside in. Once the text box is created you can go to the Table menu and select Insert table. If you already have a table, you can also import it using the File > Place dialog box.
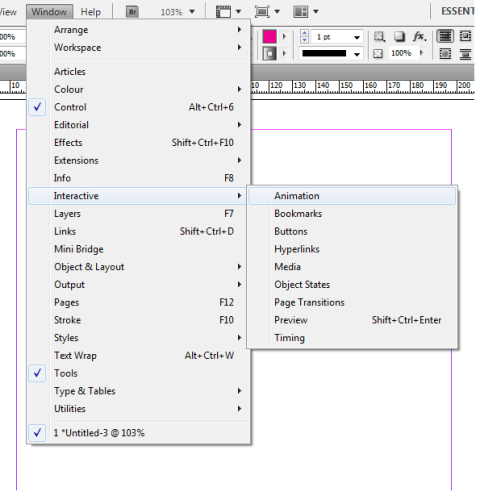
 2. Place 6 columns and 8 rows, or really however many you want. To change the size and shape of your table cells, you can go to the Table palette, which can be loaded through the Window menu.
 3. Next enter all the information you can in your form. Put the title by itself in the first row, then all the information below.
4. With that, your table is officially inserted, and you can go on to editing it in the next stage of this InDesign tutorial.
Formatting the Table
1. The first thing to do in the formatting stage is to give the title its own area. Select the entire first row including the part with the title and right click. One of the options should be to merge cells, which you should do. This will create one big cell above all the rest, like it is shown in the screenshot below. The title cell is black because it is selected.
 2. If you want your cells to be uniformly formatted, a good way to go about it is to create a new cell style. Before creating a cell style, however, you need to make a paragraph style. I already have a preset style which I created beforehand called “header”, but you can create your own however you like. To create a new cell style go to the cell styles palette, select the options button (top right corner) and click the New Cell Style option. Select the correct paragraph style and press ok.
 3. Now all you have to do is select the areas that should be formatted, the header cells in this case, and apply the cell style to them. Now the header cells are different than the rest and clearly stand out.
 In this InDesign tutorial only the basics of table formatting are covered, and there are many more things you can do. You can add color and life to your tables and style them in a variety of different ways. But for now, this basic table will get you very far and be extremely useful to you.