
Hopefully what this InDesign tutorial will show you is that page numbering in InDesign is just as easy to do as it is any other program, and much easier than in most. InDesign allows for quick, easy, and automatic page numbering, and I’ll be showing you how to do that today. It’s a simple trick to learn, takes only a few short seconds, and will be a skill that you will be thankful for every time you need to use it. You can always refer back to this InDesign tutorial should you forget any of the steps.
Inserting Page Numbers
Inserting a page number into text is extremely simple and a process that shouldn’t be hard to remember.
1. Make a text box in the location where you would like your page number to go.
 2. Right click the empty text box. Mouse over the option that says Insert Special Character.
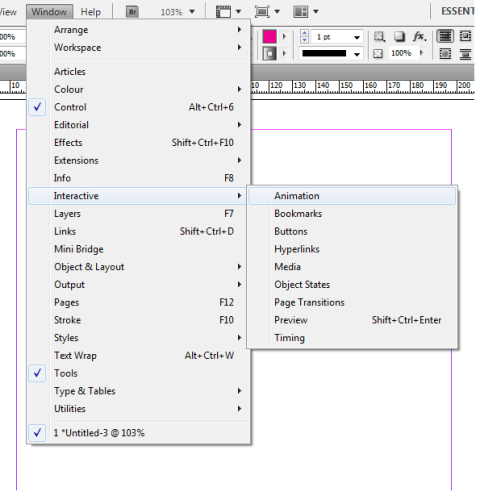
 3. There are a few options for types of characters that you can insert, but the one we want is the Markers option. There you can see the options Current, Next, and Previous Page Number as well as Section Number. Select Current Page Number to place the automatic number you want.


Formatting Page Numbers
The above steps are the most basic way to add a very basic page number, but if you follow a few tricks then you could save yourself even more time and get the job done even faster. For one thing, the page number you’ve added is only for one page, and if you used that method you’d spend ages adding page numbers to the whole document. To add page numbers to all pages quickly and format them all equally, follow these steps:
1. Go to the Pages palette and double click on the Master Page. In this page you can add elements and change settings that will automatically apply to all pages.
 2. Now you can follow all the steps from the first section. Add the page number exactly as you did above, making sure that the page numbers are positioned correctly on the pages.
 3. Formatting these page numbers is as easy as formatting any other text. Change the font family and size, color, and whatever you like, and all changes will be applied to all pages. You can add hyphens around the edges, underline, or do anything else you think will make the page numbers look appropriate to the layout.
 4. With that, your page numbers are added and formatted. Go to any one of your other pages and see how they contain the correct page numbers, and how the page numbers are formatted just as you wanted them to be.
 If you ever end up formatting a large book or magazine, then knowing the trick to adding page numbers is a blessing you will be thankful for. You’ll save hours of copy-pasting, and your designs will look sharp, attractive, well thought out, and uniformly excellent. Hopefully this tutorial passed on to you something that you will use many times over.

Pat Bjorklund
My page numbers all appear onscreen in my document where they should be, but they do not appear when I print the pages. Am using the same template as I did with a document I prepared a couple of months ago and did not have this problem when I printed all the pages in that document. The master page thing is already a done deal.
Libby Hedrick
Now all my pages say #1. What did I do wrong?