
InDesign tutorials cover a whole lot about InDesign frames. Frames are a large part of layouts in InDesign because they are what contains nearly everything. If you have an image, a text box, a table, a shape, or nearly any other kind of object, they are almost always either a frame or being held by a frame. Knowing the ins and outs of using frames can be extremely beneficial, and it’s certainly worth your time to learn. This InDesign tutorial will go a bit into the use of frames, and how to make them look great.
Framing Basics
Making a frame in an InDesign tutorial is as easy as anything. A frame is just a collection of paths, and you can do it with the shape tools, the pen tool, or the text box tool. To really be a frame, though, the frame must contain something, and that’s extremely easy to do.
1. Select the thing you want to frame.
2. Cut it (Ctrl X)
3. Right-click the frame or shape meant to be a frame, and then click Paste Into.
4. You’ll probably need to readjust the image to fit the frame, but you’ve accomplished the basics.
 Framing Text
But all that’s just the simplest part of framing. You can actually have fun with frames and create some extremely good layouts by just playing around.
1. First of all, frames usually have some sort of stroke on the outside. As this InDesign tutorial shows you, InDesign has many options for the stroke of the frame. You can make it big and fat, thin and dashed, or interesting and textured. Play around with it to find what you like best.
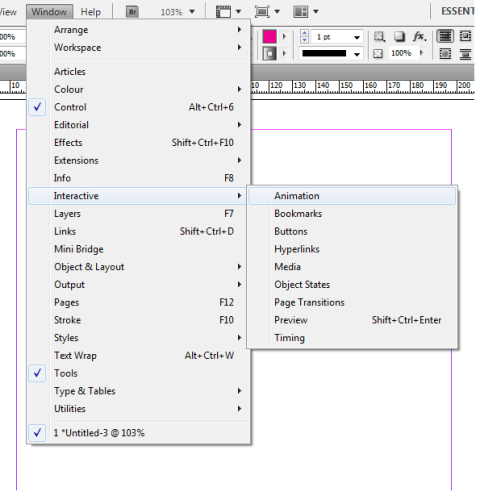
 2. You can also add effects to make your frame look even better. With the effects panel you can add inner or outer drop shadows and glows, texture, embossing, or more. You can make the frame slightly transparent or distort it however you want.
 3. You can make only 3 sides of the image have a stroke if you like. Use the direct selection tool to select the side of the frame that you want to get rid of, and simply delete it by pressing the delete key on your keyboard. You can also divide the image in two with the scissors tool and give it an interesting divided look.
 4. Have fun with your frames. Make them look as interesting and stylish as possible, while not detracting from the rest of the layout. You can change the color of the strokes to make it match better, distort the frames to make them look wacky, or really do anything you want. If it’s just a practice project you’re working on, then try to do everything you can to your frames to learn how best to work with frames.
Learning to use frames is actually very easy, it just takes a simple InDesign tutorial like this one to help people to learn the basics. Almost all layouts and designs have some sort of interesting frame use, and it’s an important part of the design process.
Urvasi Devi Dasi
Thanx … really needed this info for a book i am laying out that is just about to be published. I had images bleeding across spreads and the style demanded a thin stroke around each image – so thanx again.