This InDesign tutorial deals with a new feature in InDesign CS5 called live captioning. This feature is extremely useful as it allows you to caption a picture imported into your InDesign document automatically. By working with Adobe Bridge to give your picture specific details, you can display those details as captions in your InDesign document. If you don’t understand yet, then read on through this InDesign tutorial to figure out how you can use this feature.
Setting Up the Live Captioning Settings
1. In this document I opened I imported 2 pictures from my computer. You can use any two pictures, as long as they have sufficient information in their details. You can edit the details of an image through Adobe Bridge.
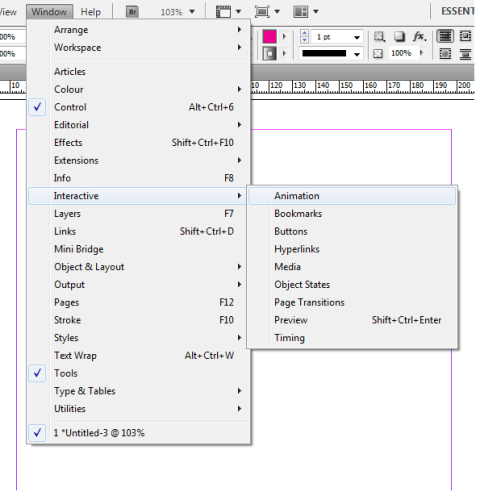
 2. Go to the Caption Setup dialog box. You can access this through Object > Captions > Caption Setup.
 3. This dialog box will allow you to determine what information will be displayed in your live caption. Modify the metadata box to have the information of your choice appear in the live caption. I chose the Description option, but you can choose anything you want as long as the picture you imported has that information filled in.
 4. Place the image in the location you want by either making it appear below, above, or to either side of the image. Change the offset so that the image isn’t crowded, and change the paragraph settings according to your preferences. Click ok.

Placing the Live Caption in the InDesign Document
5. Right click the image which you want to be captioned, and go to Captions > Generate Live Caption.
 6. You will see the live caption appears at the bottom of the picture you clicked. As you can see, the description I had for the picture of the metallic dog (which was “Metallic Dog”) shows up in the live caption.
 7. However, if you move the caption down a bit, like I did, the caption will become unlinked and stop working. Notice how it says “<no intersecting link>”, because it needs to be touching an image in order to stay live.
 8. Fix the problem by reattaching the caption to the image. You can also attach the link to another image, like I did with the metallic cat, and if it has the proper information the caption will display it. My caption, which formerly said “Metallic Dog” now says “Metallic Cat” because it is connected to the image of the cat.
 You can see just how practical learning this live captioning option from my InDesign tutorial can be if you need to caption a great many pictures without having to type in a whole bunch of info. You simply set up your live captions, and presto! Your captioning is done for you. It’s an extremely useful feature that you will certainly use in many of your design projects.