Newcomers to InDesign tutorials are often faced with the problem of figuring out how to format the corners of their squares and rectangles. It’s hard to find an obvious solution if you are unfamiliar with the program and its various options, and so this simple InDesign tutorial teaches all the newcomers a few easy methods of cutting and modifying the corners of a simple box in InDesign CS5.
Corner Options
1. The first thing to do is to open a new InDesign document, with whatever settings you like, and draw a rectangle in the middle. Make the fill of the box pink and the stroke black.

2. The default stroke setting is generally set to 1 pixel, so go to the box on the top of the screen that controls the size of the stroke and change it to 10. You now have a pink rectangle with a much more visible black outline.

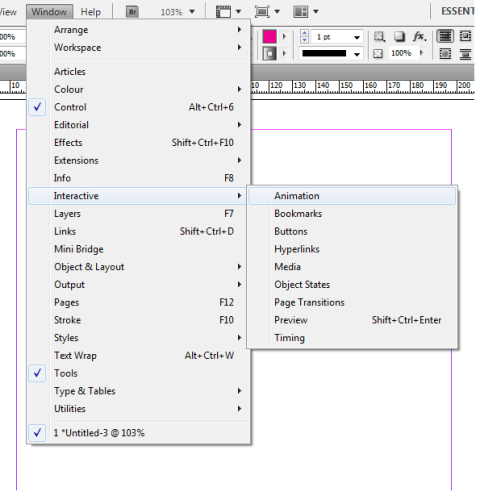
3. Select the rectangle with the selection tool. The corners right now are at their default. To modify them, go to the menu on the top of your program window. Select Object > Corner Options. When you click corner options it will bring up a box with four areas in it. Each of these four areas represents one of the corners. If you increase the number in one of the boxes, all four will change and the corners will start appearing on the rectangle. There is also a drop down menu beside each box which will allow you to modify the type of corner you want on your rectangle. Experiment with the sizes and types of corners, and check the box that says preview to be able to see the changes in the rectangle as you work.

4. In order to change only a single corner, you must click the button in the center of the dialog box that has a link icon on it. Clicking this will unlink the four corners and allow you to modify each individually.
Without the Dialog Box
If you prefer to do the modifications without using the dialog box, which can be a bit time consuming, you can modify your rectangle straight from your workspace by clicking a little yellow box that appears in the top right corner of the selected object. The yellow box will turn into four yellow boxes when you click it, and these boxes can be dragged to create corners just like the ones created from the dialog box.


If you want to change the type of corner the box has, click the yellow boxes while pressing alt on a PC or option on a Mac. Hold shift to only change one of the corners of the rectangle.


The corner option in InDesign is one of the most useful things you will learn from an InDesign tutorial and something that you will end up using a great deal during your work.