Now here’s something that almost every InDesign tutorial uses: guides. Guides are one of the fundamentals of working in InDesign. In fact, you pretty much can’t get a design to look right if you don’t use them. They’re essential for making your work look right, and unless you’re a very talented and experienced designer, you should never try to work without them. They’ll always be useful to some extent, and so learning a few tricks for using them can be quite beneficial.
Resizing
One interesting trick that you can do with your InDesign guides is to resize them to fit your needs. Usually, when you want a guide you just drag it out and let it go all the way across the page. By resizing them, as this InDesign tutorial will demonstrate, you can perhaps create more exact, precise, and easy to work with guides.
This technique uses a bit of a sneaky trick to work. It’s not so much a way of resizing the guides as creating guides of a certain size and then resizing the page.
1. First, create a new document; let’s say 3 cm by 3 cm.
2. Go to the Master Page. Drag out a few guides to make a cross.
 3. Now these guides will show up on all pages. Go to page 1 of the document, and click on it with the page tool
4. Resize the document to whatever size you want (Letter for now), and make sure it’s anchored in the middle. You’ll have a small cross in the middle of your document which is really just the guides that we’ve now made small.
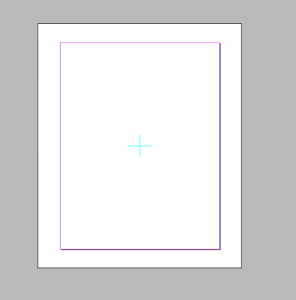 This trick may not have all that many practical uses, but it’s interesting to find a little hack to get around one of InDesign’s restrictions.
Colors
The next tip in this InDesign tutorial is a bit more useful than the last. I’ll show you what the guides mean when they appear in different colors. You may have seen these a few times, guides appearing that you didn’t place there. These guides are automatically put in by InDesign when you have the Smart Guides settings applied.
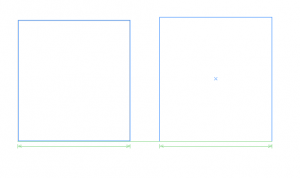
1. Blue guides. These appear to show you the distance between gaps when you are using the gap tool. If you’ve dragged an object to a distance where the gap matches another gap, the blue smart guide will show up.
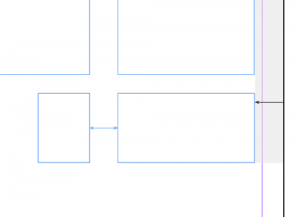 2. Pink guides. The pink guides are displayed when you’ve centered an object to the page or another object.
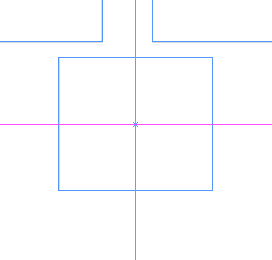 3. Green guides. These are probably the ones that you’ll see most often, as they appear when you’ve aligned something vertically or diagonally with another object.
 Knowing a bit about your guides can help you to get your work done faster and easier. The information in this InDesign tutorial may come in handy to you sometime soon, and maybe you’ll be thankful you read it here.


