Part 1 of this InDesign tutorial covered a few basic ideas for adding effects to your text, and this part will offer a few more. InDesign is much more versatile and modifiable that I can possibly cover in just a two part tutorial, but here are some more basics.
Overlapping Effects
With all the effect techniques you learned from the last tutorial (plus the many more I hope you learned on your own through experimentation), what if you want to combine two or more object to create an overlapping effect? Learning how to create overlapping frames with interesting effects can open up your possibilities in a certain design tremendously, and once again, InDesign makes it easy:
1. If you have 2 words that you want to overlap, you’ll have to begin by separating them into two different objects and giving them each a different color. The overlapping effect we want to achieve won’t work even if the settings of your words are styled to overlap but they’re still one object.
 2. Once you’ve separated your words, set your effects for each. We’ll do an emboss effect with an inner glow for both.
 3. Now that that’s done, the two can overlap. Position the one over the other in an interesting way, then set the top one to have a blending mode of multiply. The effect will be very interesting.
 4. You can play around with this a bit, changing the effects added and the blending modes you use. You can come up with something very wacky or very stylish if you experiment enough.
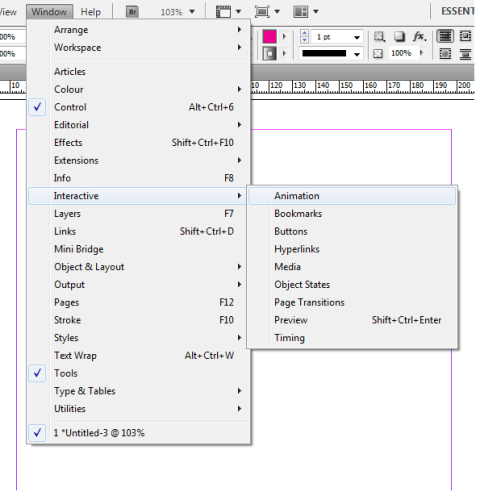
Text Wrap & Type on a Path
I’ve gone into the Type on a Path tool before, but using this in combination with the effects and gradients can be even better. For instance, make a wavy path. Use the type on a path tool to add some text. Give the text a blue gradient, a slight emboss and an inner glow, and you’ve added an interesting watery effect to your text.
 You can also make your text wrap into and around interesting shapes very easily.If you want to wrap around an object, a letter say, then it’s very simple. Make a text box filled with placeholder text, and a large letter to wrap it around. Simply use the Wrap Around Object Shape in the Text Wrap palette (the third option) to make text wrap around the letter, but still stay tight in line. Uncheck the Suppress Text Wrap option in your Layer Options dialog, and the text will look like it’s wrapping around nothing.To make the text wrap into the invisible shape, check Invert in the Text Wrap Palette.
 Et Voila! Hopefully this InDesign tutorial and the one preceding it have both been helpful in supplementing your knowledge of InDesign just a little more.