Learning how to do drop shadows from this InDesign tutorial can help you add life and depth to your designs. Drop shadows add a 3D feel to your layouts and make your elements pop. A well applied drop shadow can give your designs much more interest and add just that little extra boost to the overall look.
InDesign is very good with allowing users to add drop shadows and it allows almost as many options as any of the other programs. If you have experience with Photoshop’s or Illustrator’s shadowing options, then you will be able to breeze through this InDesign tutorial in no time at all.
Applying and Editing the Basic Drop Shadow
1. Get your elements onto your page. In my document I put two different items of text for the purposes of the second phase of this InDesign tutorial.
 2. Select the object or text that you want to shadow. On the top of the window you will see the whole object menu that is usually at that location. Right next to the stroke options there are a collection of buttons for adding effects. Click the one as shown below, the one to the left of the fx button.
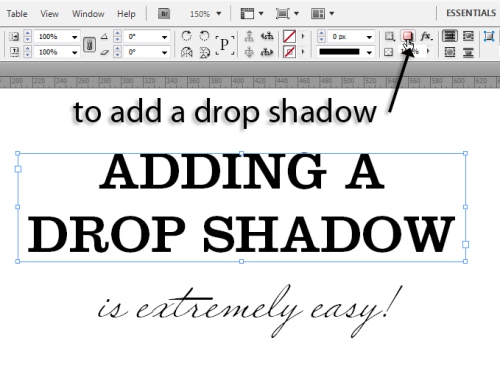 3. Your drop shadow is added! But this default drop shadow isn’t really one that I want to use, and I want to modify it to be a bit more subtle.
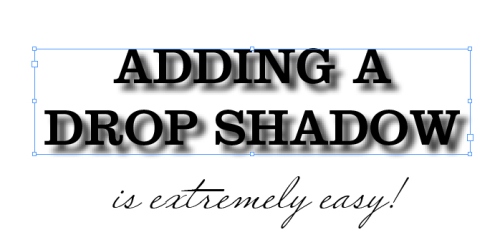 4. To modify the drop shadow click on the fx button > Drop Shadow. This will open the effects dialog box.

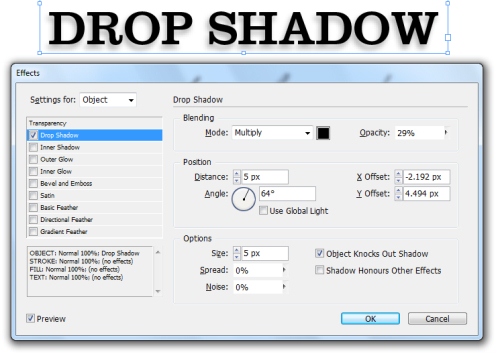
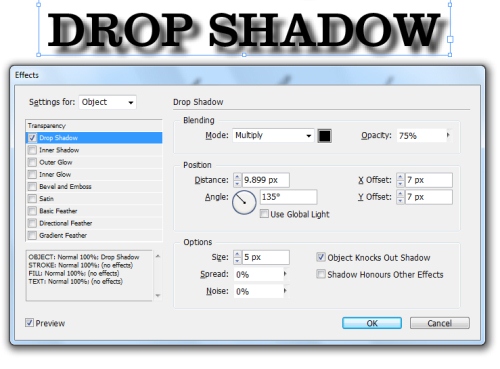 5. Play around with the setting a bit to change the drop shadow. The opacity of the shadow can be toned down quite a bit, and the shadow can be brought closer by modifying the distance. You can try different things to see what you like, and then click OK. Now that’s a subtle drop shadow you can be proud of.
 Applying the Drop Shadow to Other Items
6. So now that my first object has a drop shadow, I also want my second one to have a similar one. It’s extremely easy to apply an effect to multiple objects, and I will show you how. Click the drop shadowed text and go to the Effects palette.
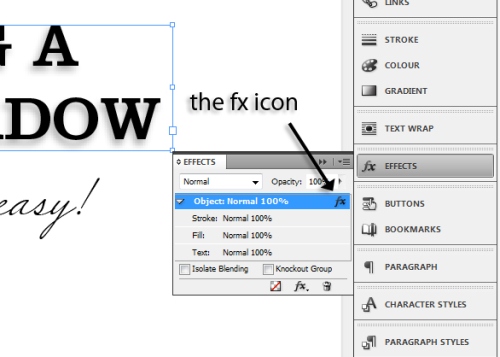 7. Click and drag the little fx icon that is by the object in the palette. Drag it out and onto the second object.
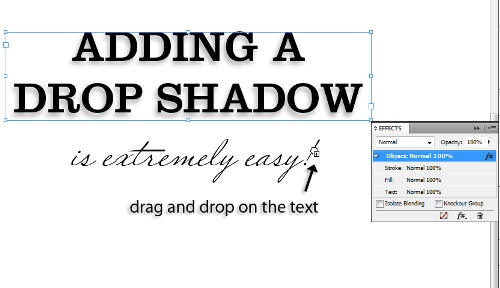 8. When you’ve dragged and dropped the fx icon onto the second object, the same style is applied and the same shadow is added. Now, here’s what your finished product should look like.
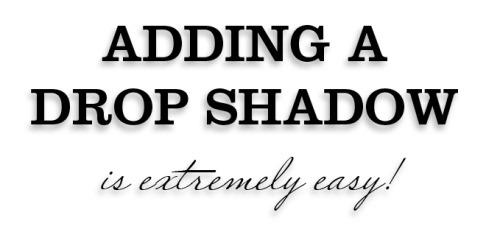 Drop shadows are an essential part of many designs and layouts, and learning how to apply them quickly and correctly from this InDesign tutorial is important if you want to maximize your effectiveness and proficiency with the program.


dinesh
nice website very knowledgefull