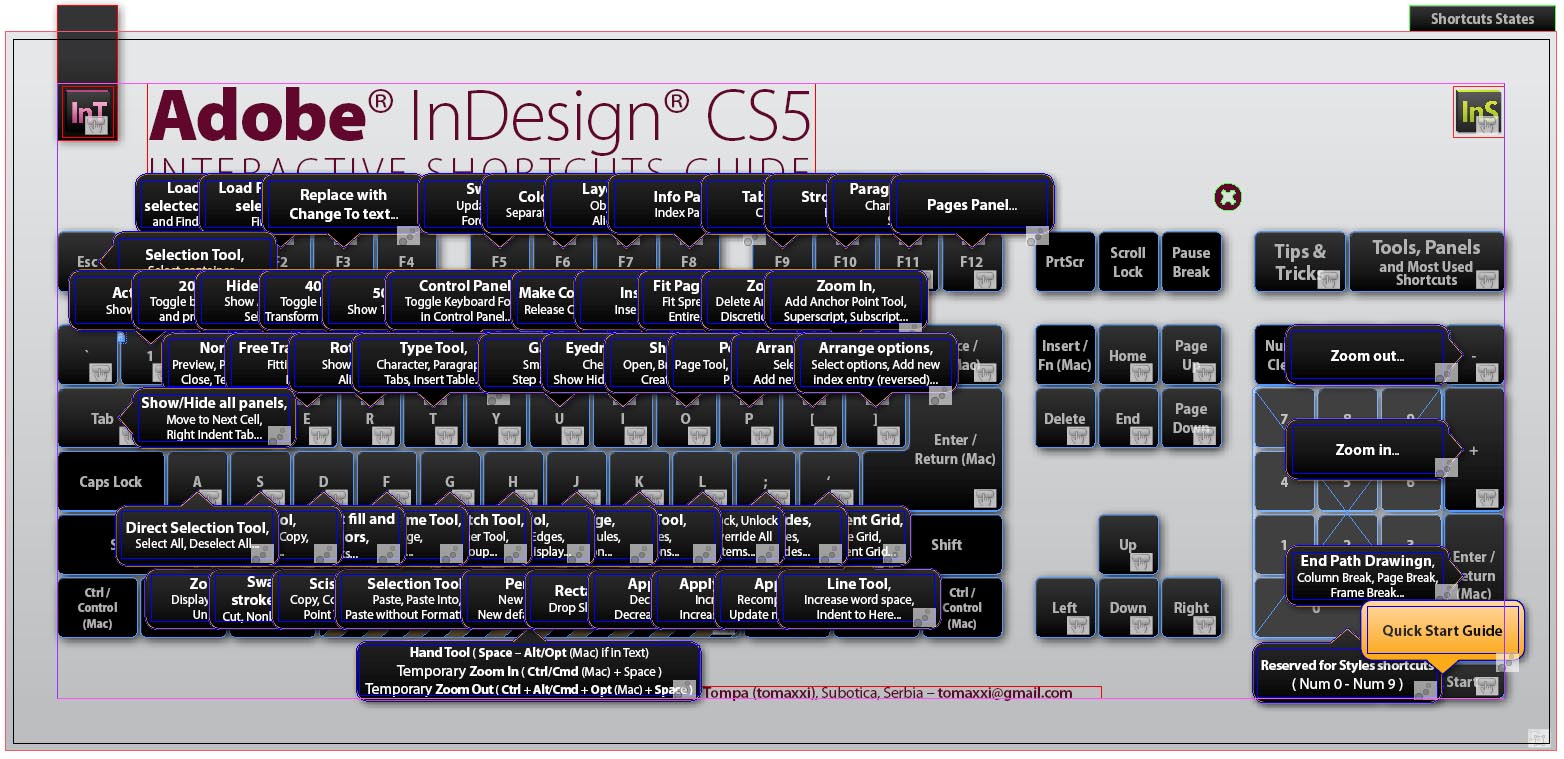
InDesign tutorials often lack in the area of teaching users how to use the gradient features of the program. InDesign isn’t the most practical program for creating artwork, and its color features aren’t the most refined or useful, and yet it does have many capabilities. This InDesign tutorial goes in depth about the Gradient Tool, the Gradient Palette, and the Gradient options InDesign offers.
Creating a New Gradient
When working with gradients in InDesign, you have to know quite a bit about InDesign’s color options. They are relatively simple, but they take a bit of getting used to. The layout of the color options in InDesign is quite a bit different than that of Illustrator or Photoshop, and yet you can learn how to use the color options with a bit of practice.
Once you know this, you can start learning how to make your own gradients. The process is simple.
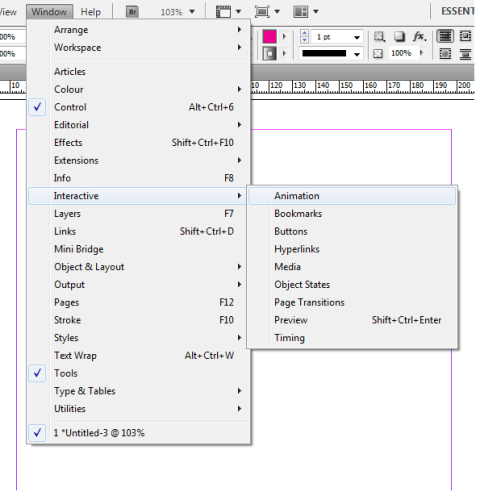
1. Pull out the Gradient Palette. If it isn’t open already, go to the Window Menu to select it.
 2. Drag a swatch onto the palette. You will notice a new gradient is formed.
 3. Drag another swath onto the palette, and another new gradient is formed, this time of the two colors.
 4. If you want to save this gradient for later, select it and drag it up to the swatch palette. Now, when you want one of your shapes to have a certain gradient, the swatch is there when you need it.
 Editing Swatches

If you have made mistakes on the gradient you are working on, it’s easy to undo, delete and edit this mistake. You don’t have to start all over again, simply use in following InDesign tutorial steps.
1. To get rid of a certain color in your current gradient (as long as it has more than 2 colors), drag the slider out of the palette. It will be removed.
 2. Change the tone and amount of your gradient by moving the sliders around within the gradient palette. If you want your gradient to be mostly yellow, with only a tiny bit of blue on one end, that’s easily done by moving the right slider (see screenshot).
 3. If you don’t want your object to just have the basic gradient, you can change it to a radial gradient by selecting that option in the gradient palette.
 4. No matter how much you modify your gradient, be sure to save it into your swatches for later. If you don’t life one of the gradients you’ve saved to a swatch, simply drag it over the trash icon to delete it.
Working with gradients is easy, as this InDesign tutorial has shown, and it’s a great way to add some life and color to your designs. Experiment with using gradients, not only as a fill but as a stroke as well, ad n you could come up with some extremely interesting effects.