InDesign tutorials are often about InDesign’s text processing capabilities, and this is another one of those. Once again I have to say that InDesign is one of the most useful and versatile programs for editing text and creating layouts of nearly any sort, and this next feature you’ll be learning about is just another reason to believe that. This InDesign tutorial shows you just how InDesign’s Next Style feature works, and how you can put it to use in your layouts.
The next style feature allows you to quickly format your text with varying styles. It can be useful for poems, books, question and answer series, interviews, and more. The first thing you’ll need to do is set the styles, then learn to apply them.
Setting the Styles
First of all, you’ll need two paragraph styles to work with. If you don’t have them already, look back through some of the older InDesign tutorials to see how to create them, then follow the below steps.
1. Assuming you’ve got your two styles set, you should have two differently formatted paragraphs. Each paragraph should have its own separate style set, and your paragraph styles palette should look something like this:
 2. Now that you’ve got the two styles set, you’ll want to enter the settings of the first style. You can do this by double clicking on the option in the palette.
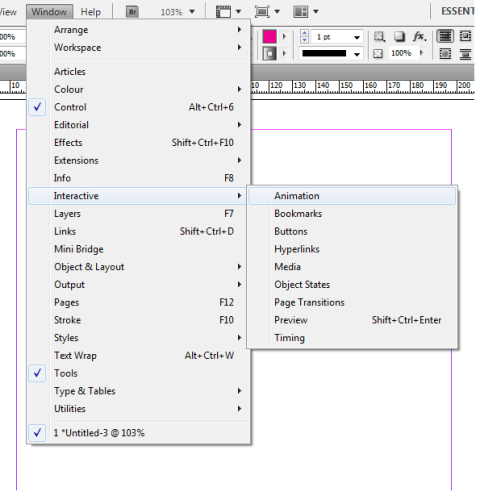
3. With the styles dialog open, click on the box that says Next Style. Here there will be a list with the three styles in the palette (counting the basic paragraph text style). Set the second style as the Next Style option.
 Now you’ve got the styles set, and it’s time to format the text.
Formatting the Text
1. We’ll reset all the text back to the Basic Paragraph Style so you can see the full effect of the next style feature. Now select all the text you want to have the formatting. It doesn’t work automatically that the second paragraph will be formatted unless you have it selected. So press Ctrl A to select all the text in the text box.
 2. Just clicking the first style in the palette will not set the text with alternating styles. It will just set the one style, because you have to do something more to use the Next Style feature. You have to right click, then you will see the option “Apply [style name] the Next Style.” This is what you want to click and what will have the right effect.
 3. Now your text should be formatted with alternating styles, and your layout should look just like you want it to. If you want to have two or three paragraphs in a row with the same style, this is easy to do as you can simply change them directly.
 The Next Style feature that you’ve learned about in this InDesign tutorial will definitely be useful to you when you do future layouts. You’ve learned an InDesign shortcut that could save you hours in selecting and formatting individual areas of text, and you’ll be thankful that you did in the future.